It feels good to have software like QuickBooks which is helping in making our business work smoothly and effectively. But you can’t ignore the errors that come with it while using QuickBooks. Every software needs an update such as QuickBooks but while updating you see that you got stuck and can’t move forward without knowing the reason behind it. Then an error message flashes on your screen “Error 15106: The update program is damaged, or Error 15106: the update program cannot be opened.”
The QuickBooks Error 15106 arises at the time of update of QuickBooks or Payroll. We are here to make sure that this article will be the best solution for your QuickBooks Error issues. Be with us and become a pro to fix any kind of 15XXX series errors.
What is QuickBooks Payroll Error 15106?
QuickBooks error 15106 is a common error series of 15000 that pops up when you are doing a Payroll update. The reason behind it is that you haven’t been given access or due to firewall restrictions. Before getting into solutions first let us go through the causes and symptoms to know the error a bit more.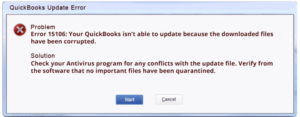
Causes Behind QuickBooks Error 15106
We know that QuickBooks error 15106 is coming at the time of update. Now, we need to know what other factors could have caused this error. Look at the causes below:
- You haven’t signed in as Admin on your PC.
- Due to security and wrong antivirus blocking your system.
- Failed to install all components required in updating applications or payroll.
- The User Account Control settings are being turned ON.
- When an error message displays on your screen.
- Internet connectivity is not good.
Best Solutions to Resolve QuickBooks Update Error 15106
Here are the easiest troubleshooting solutions to resolve QuickBooks error code 15106. We can start with simple steps to get rid of it. Carefully read the solutions and choose what suits you best.
Solution 1: Restart QuickBooks Updates
We all know that updating QuickBooks or any software is needed regularly. It will enhance your productivity and you will be able to complete your work in less time.
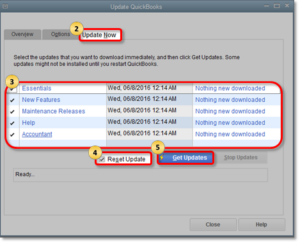
- Firstly choose Update QuickBooks Desktop from the Help option.
- Then select Update Now or select Reset Update checkbox to remove all previous updates.
- Now, click on Get Updates to start the download.
- Wait for a few sec till the download ends.
- Lastly, restart QuickBooks.
Solution 2: Sign in as an Administrator in your Account
QuickBooks error 15106 occurs as you haven’t logged in as Administrator. So, for that sign in as Admin to get rid of this error.
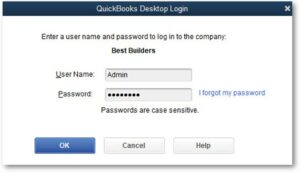
- Access Quickbooks and you need to log in as admin.
- Select Company and then click on Set up Users and Passwords.
- After that tap on Set Up Users and from the list of Windows choose Admin.
- Lastly, hit on Edit User and write the name of the person who will be the administrator.
Also Read- What is QuickBooks Install Diagnostic Tool?
Solution 3: Disable User Account Control
User account control helps to protect your system from any malware attacks. You can use this solution to resolve your Error 15106 Quickbooks.
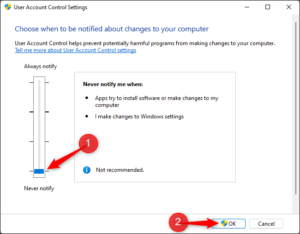
- Go to Start and select the Control Panel.
- Then choose User Accounts and turn User Account Control on or off.
- After that Deselect User Account Control and tap on OK.
- Lastly, reboot your PC.
Solution 4: Turn off Antivirus or Security Software
It might be possible that your antivirus is blocking some software from functioning in your system. So try to turn it off with these simple steps mentioned below.
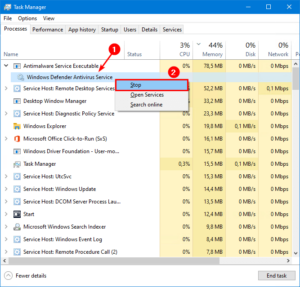
- Hold Ctrl + Shift + Esc on Keyboard then a Task Manager window will pop up.
- After that, tap on Processes and navigate [ANTIVIRUS].exe.
- Now, hit End Process and uninstall the antivirus or security program.
- Finally, reopen QuickBooks again.
Solution 5: Change the Name of the Folder
After using the above solutions, if you are still not able to solve your Quickbooks Error 15106 then you need to rename your folder with these steps:
- Go to File Explorer by holding Windows + E.
- Then go to the path C:\Program Files\Intuit\QB(year)\Components.
- After that look for the folder with download qbXX.
- Now, just click on Rename and add .old at the end of your file.
Solution 6: Run the “Reboot.bat” file
Reboot.bat file automatically routine tasks without user input or intervention. Here is what you should do:
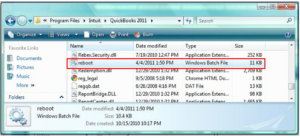
- Turn off QuickBooks and access the folder that contains the reboot.bat file.
- After that, execute the reboot.bat file and wait till it is completed.
- Lastly, check if the error is resolved.
Also Read- QuickBooks Error 15125: Causes, Symptoms and Solutions
Conclusion
So, there you have it. After carefully reading our article, you will be able to get your answers and your QuickBooks error 15106 will be solved soon by using any of the solutions mentioned above. For any further assistance, we are always up for a chat or call 24×7.